Click on “Settings” icon on the upper right side of the page.
Then, click on “Account Settings” item on the upper left side of the page to open user settings field.
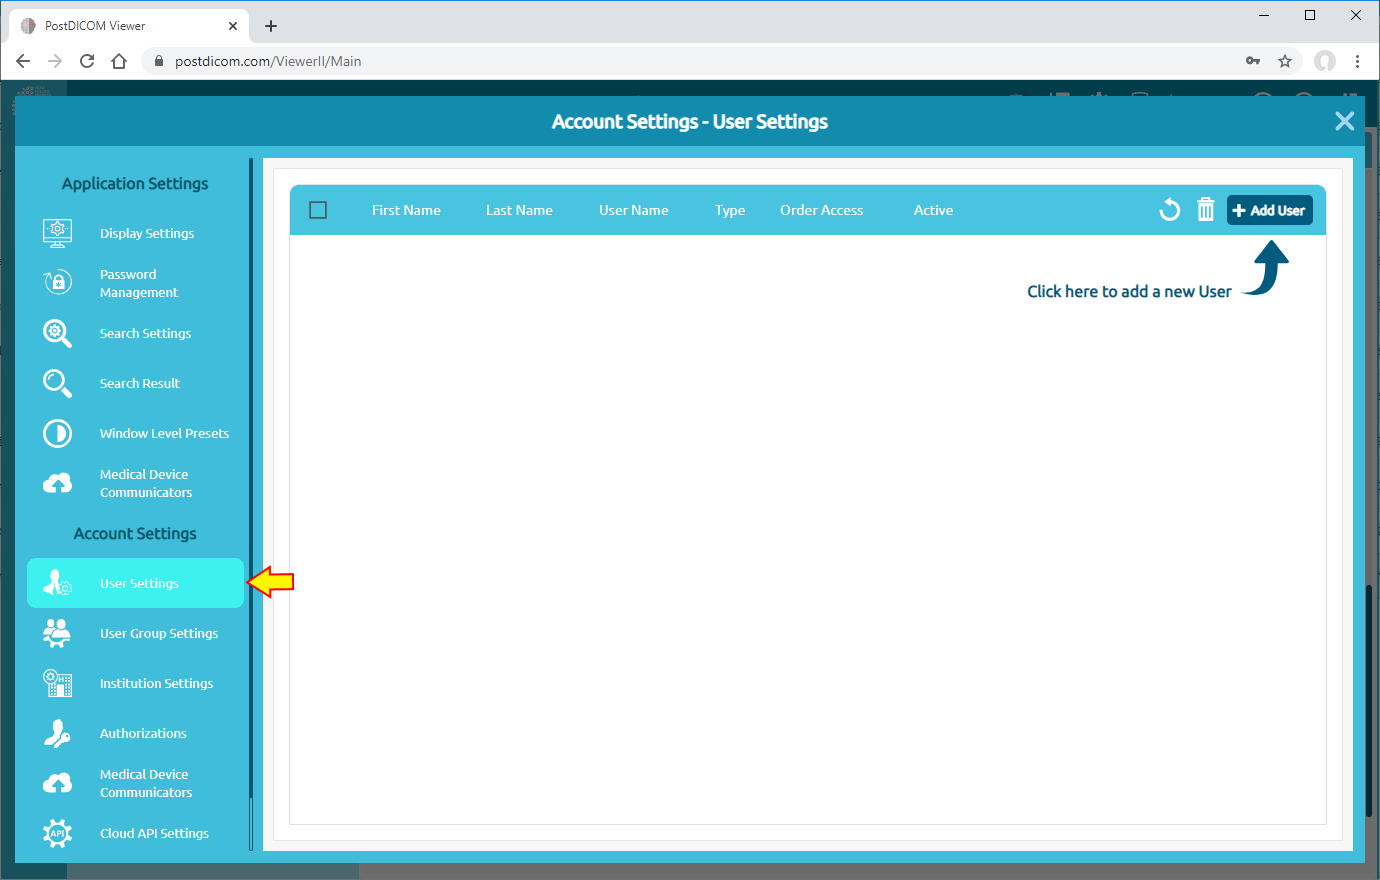
After clicking, “User Settings” page will be opened. You will see all the sub-users at your account with first name, last name, user name, type, and active/passive information.
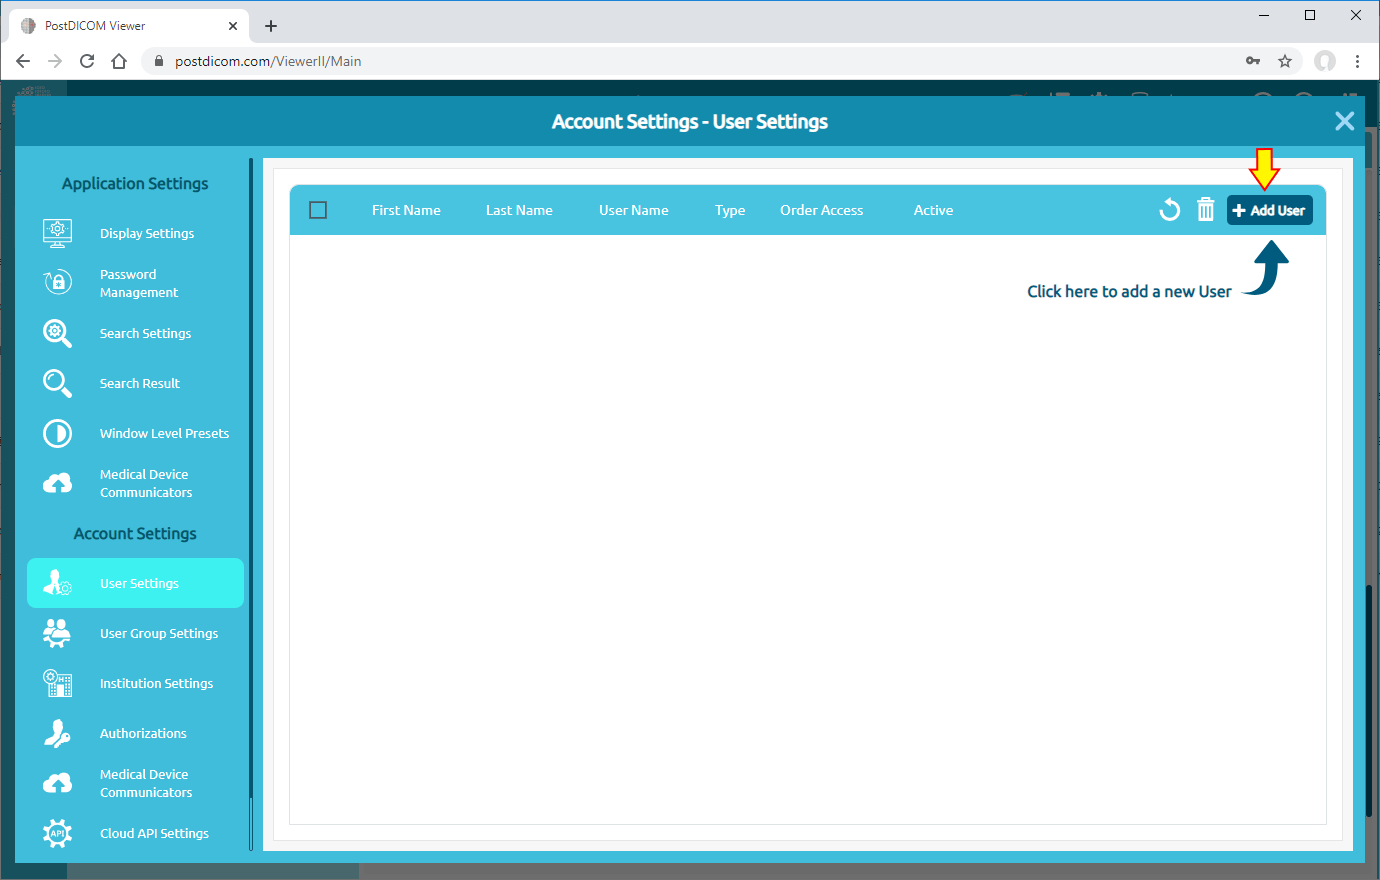
You can add sub-user by clicking “Add User” button on the upper right side of the page.
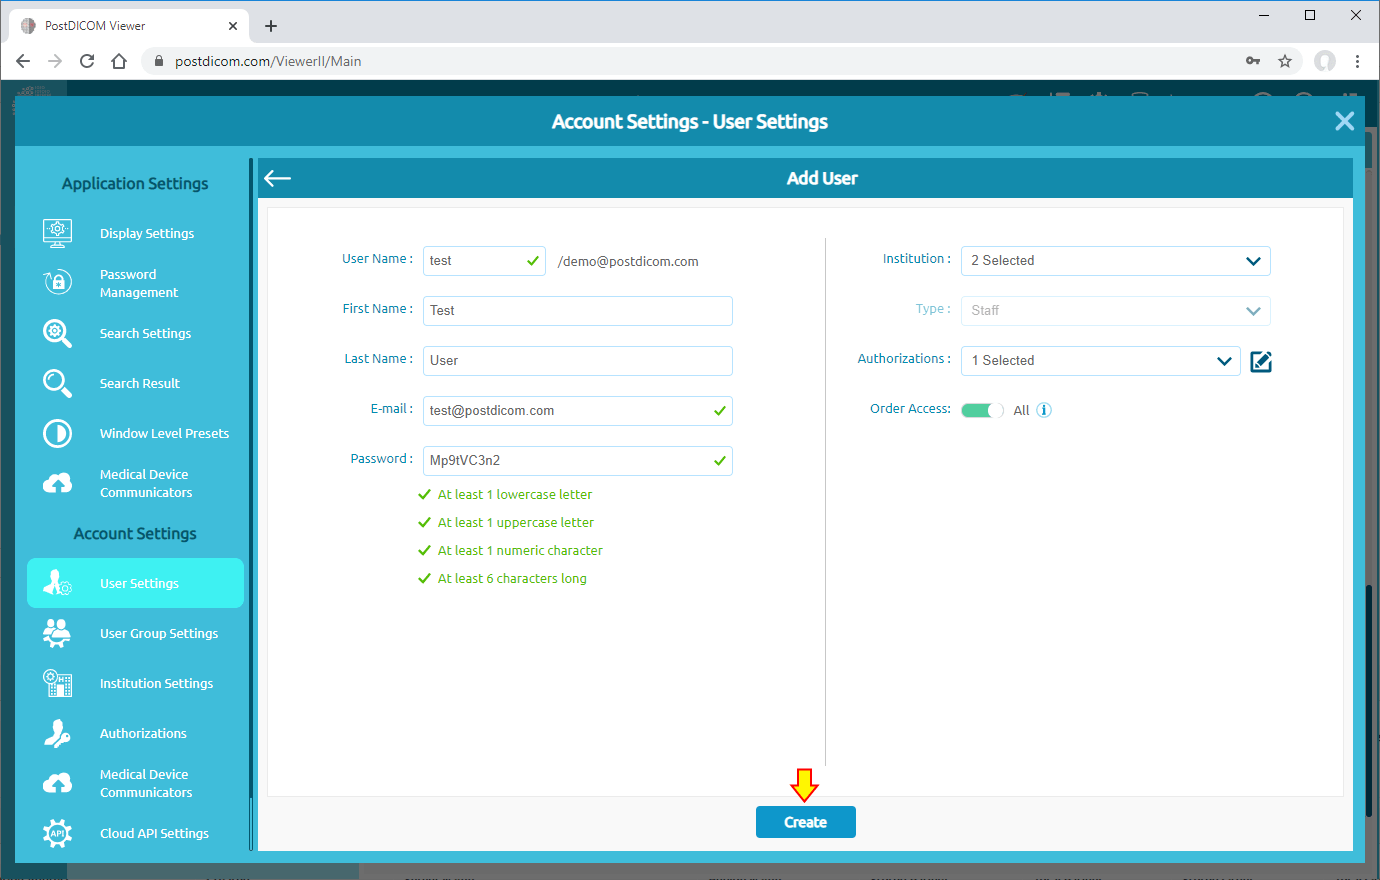
When you click on the button, add user form will be opened. Fill the form with necessary information and then click on “Create” button.
If you want your patients to upload images change user type to “Guest”. That way they can only see what they have uploaded. They cannot see other patients’ images.
If you want to create a user who can search all of the patient images, change user type to “Staff”. Users (for example the doctors) created with that option can search all of the patients in the assigned institutions.
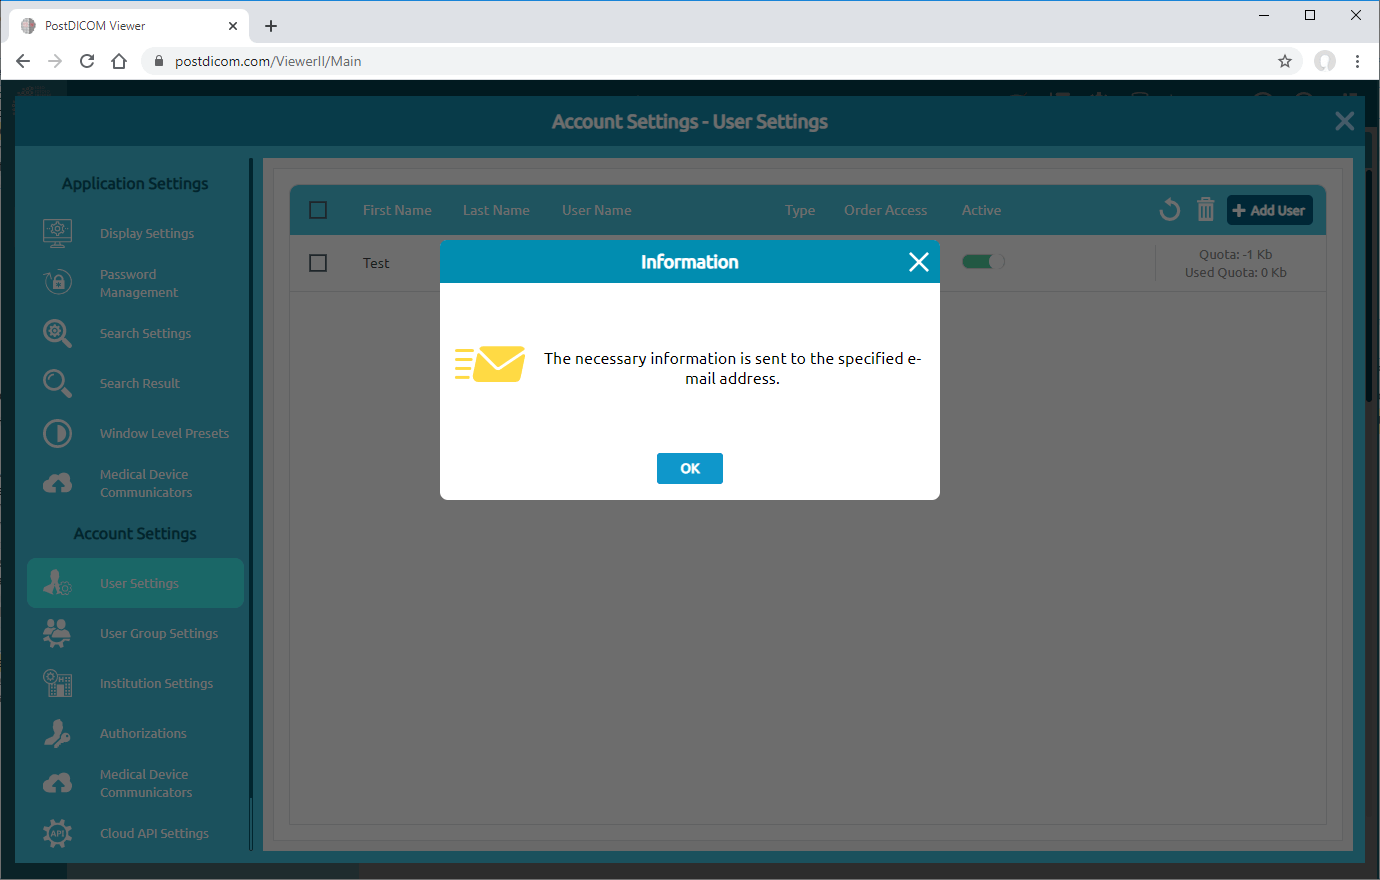
A new user will be created and login information will be sent to the user’s e-mail address and following message box will be shown. Click on “OK” button to close the message box.
The newly created user will be shown on the Users list.
On User Settings list, user access to the account can be suspended by deactivating the user. When you create the user, it will be inactive status and displayed in green color. In order to deactivate it, click on the active/inactive icon. It will turn into white color.v
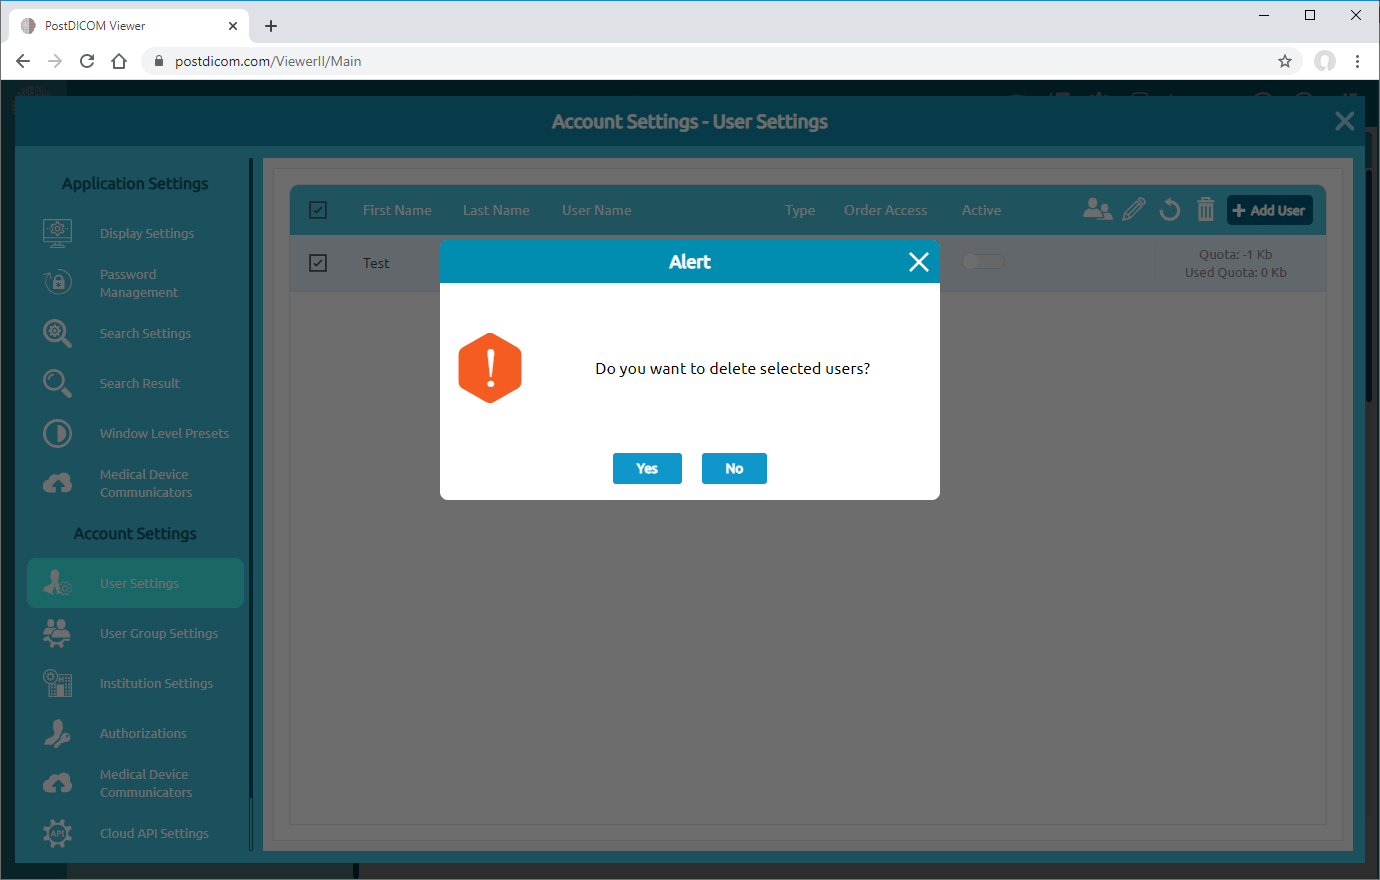
In order to delete the user, select the user you want to delete by clicking the checkbox on the left side of the Users. If you want to delete all users, click on the checkbox on the left side of the header.
After selecting the users to be deleted, click on Delete icon on the upper right side of the header.
Once you have clicked on the Delete icon, confirmation message box will be shown. Click on “Yes” to confirm that you want to delete the selected user. If you don’t want to delete them, click on “No”.
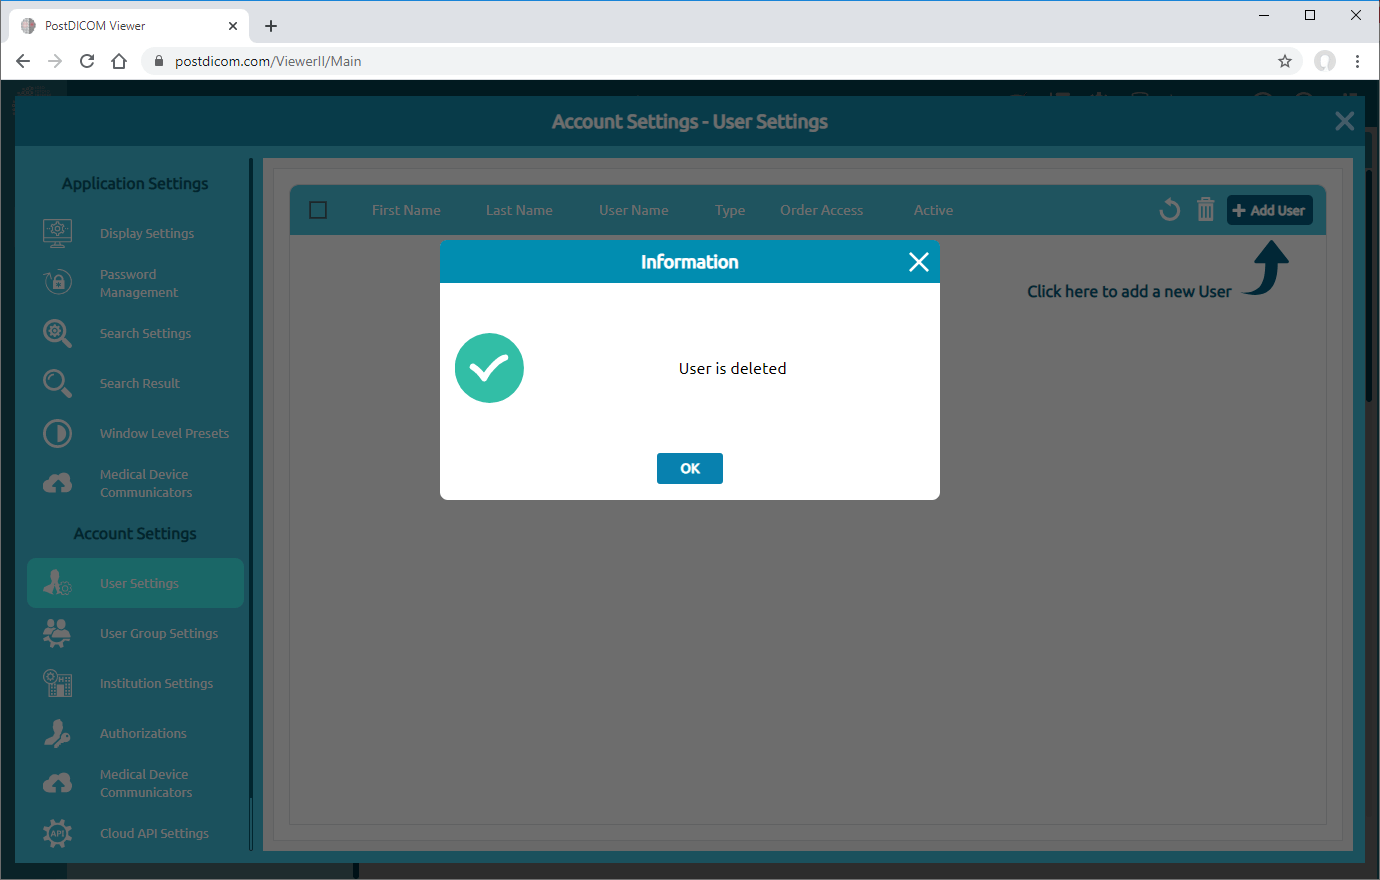
After clicking on “Yes”, selected user will be deleted and the following message box will be shown. Click on “OK” button to close it.